
Setting up Postman
Follow this step-by-step guide to learn how to utilise Postman to explore and interact with our APIs.
Postman is a desktop and web application for working with APIs. With Postman, it is simple to create and send HTTP requests, inspect the responses, and efficiently organise these requests into collections for testing and automation. We offer a ready-to-use Postman collection that empowers users to explore and interact with our APIs, without having to write any code.
Prerequisite
Before you start, be sure to complete the following prerequisites. Skip to 'Using Postman to interact with Our API' if you've already completed these steps.
- Create a free account with Postman
- Create a Quant Connect account
Using Postman to interact with Overledger API
The best way to manage a collection is to initiate a fork. By doing so, you can add Overledger's updates to the collection as they are made available. This action also grants you the flexibility to make modifications and propose them as a pull request.
1. Import our API documentation
We provide a Postman collection that contains all the requests you need to interact with our API. You can access our postman collection from here: Quant Network - Overledger.
2. Add your clientId and clientSecret
When you add the collection to your Postman, it automatically adds an environment called ‘Overledger API'. Within this environment, you will be required to input your clientId and clientSecret. In this step, we explain the process of adding your clientId and clientSecret from your application into the ‘Overledger API’ environment.
To add your clientId and clientSecret to the 'Overledger API' environment, click on the 'Environments' section in the left sidebar of Postman and you will see a list of available environments to choose from.

Click on 'Overledger API' to select your environment.
Next, add a variable for your clientId and clientSecret which have been generated through the Quant Connect dashboard.
Below is a visual representation of how your variables should appear:

- Please be aware that the clientId and clientSecret in the table above are purely for demonstration purposes and will not function if used in a request.
Once you’ve added your clientId and clientSecret as variables and have made sure that the Overledger API environment is selected, you will be ready to make requests to the Overledger API collection. This occurs because every Authorization tab within the endpoint is configured to automatically inherit the variables from the environment.
3. Generate a JWT with Postman
Our APIs are secured using OAuth 2.0, an industry-standard protocol for secure authorisation.
To access our APIs, developers must obtain an access token using OAuth 2.0. This token is used to authenticate requests to our APIs and ensure that only authorised users and applications can access the requested resources.
To configure OAuth 2.0 for your collection in Postman, follow these steps:
-
Click on the collection in your workspace and navigate to the 'Authorization' tab
-
Select 'OAuth 2.0' as the type in the 'Authorization' tab
-
Go to 'Configuration Options' under the 'Configure New Token' section
-
Update the 'Grant Type' to 'Client Credentials'
-
Update the following parameters in your environment variable section:
- Access Token URL: Add https://auth.overledger.io/oauth2/token
- Client ID: Add your OAuth 2.0 client ID from the Quant Connect dashboard
- Client Secret: Add your OAuth 2.0 client secret from the Quant Connect dashboard
-
Click 'Get New Access Token' to generate an access token
You are now ready to use the Postman collection.
4. Trialing an API
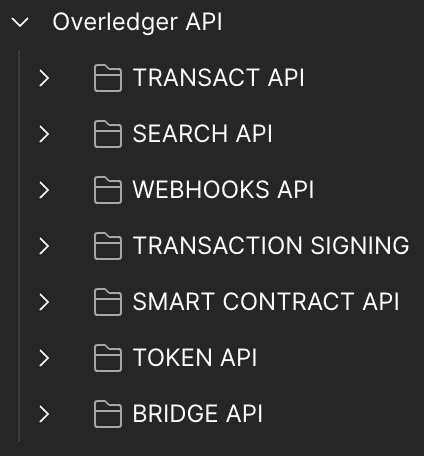
Next, users must select an endpoint from the collection. From here you can start to build your request. You can select an endpoint from the left-hand side navigation as demonstrated below:
5. Populate the Params tab with values
Now you should navigate to the Params tab.
You will observe a series of inactive parameters, each with a description detailing its function and a list of all potential values that can be included within your request.
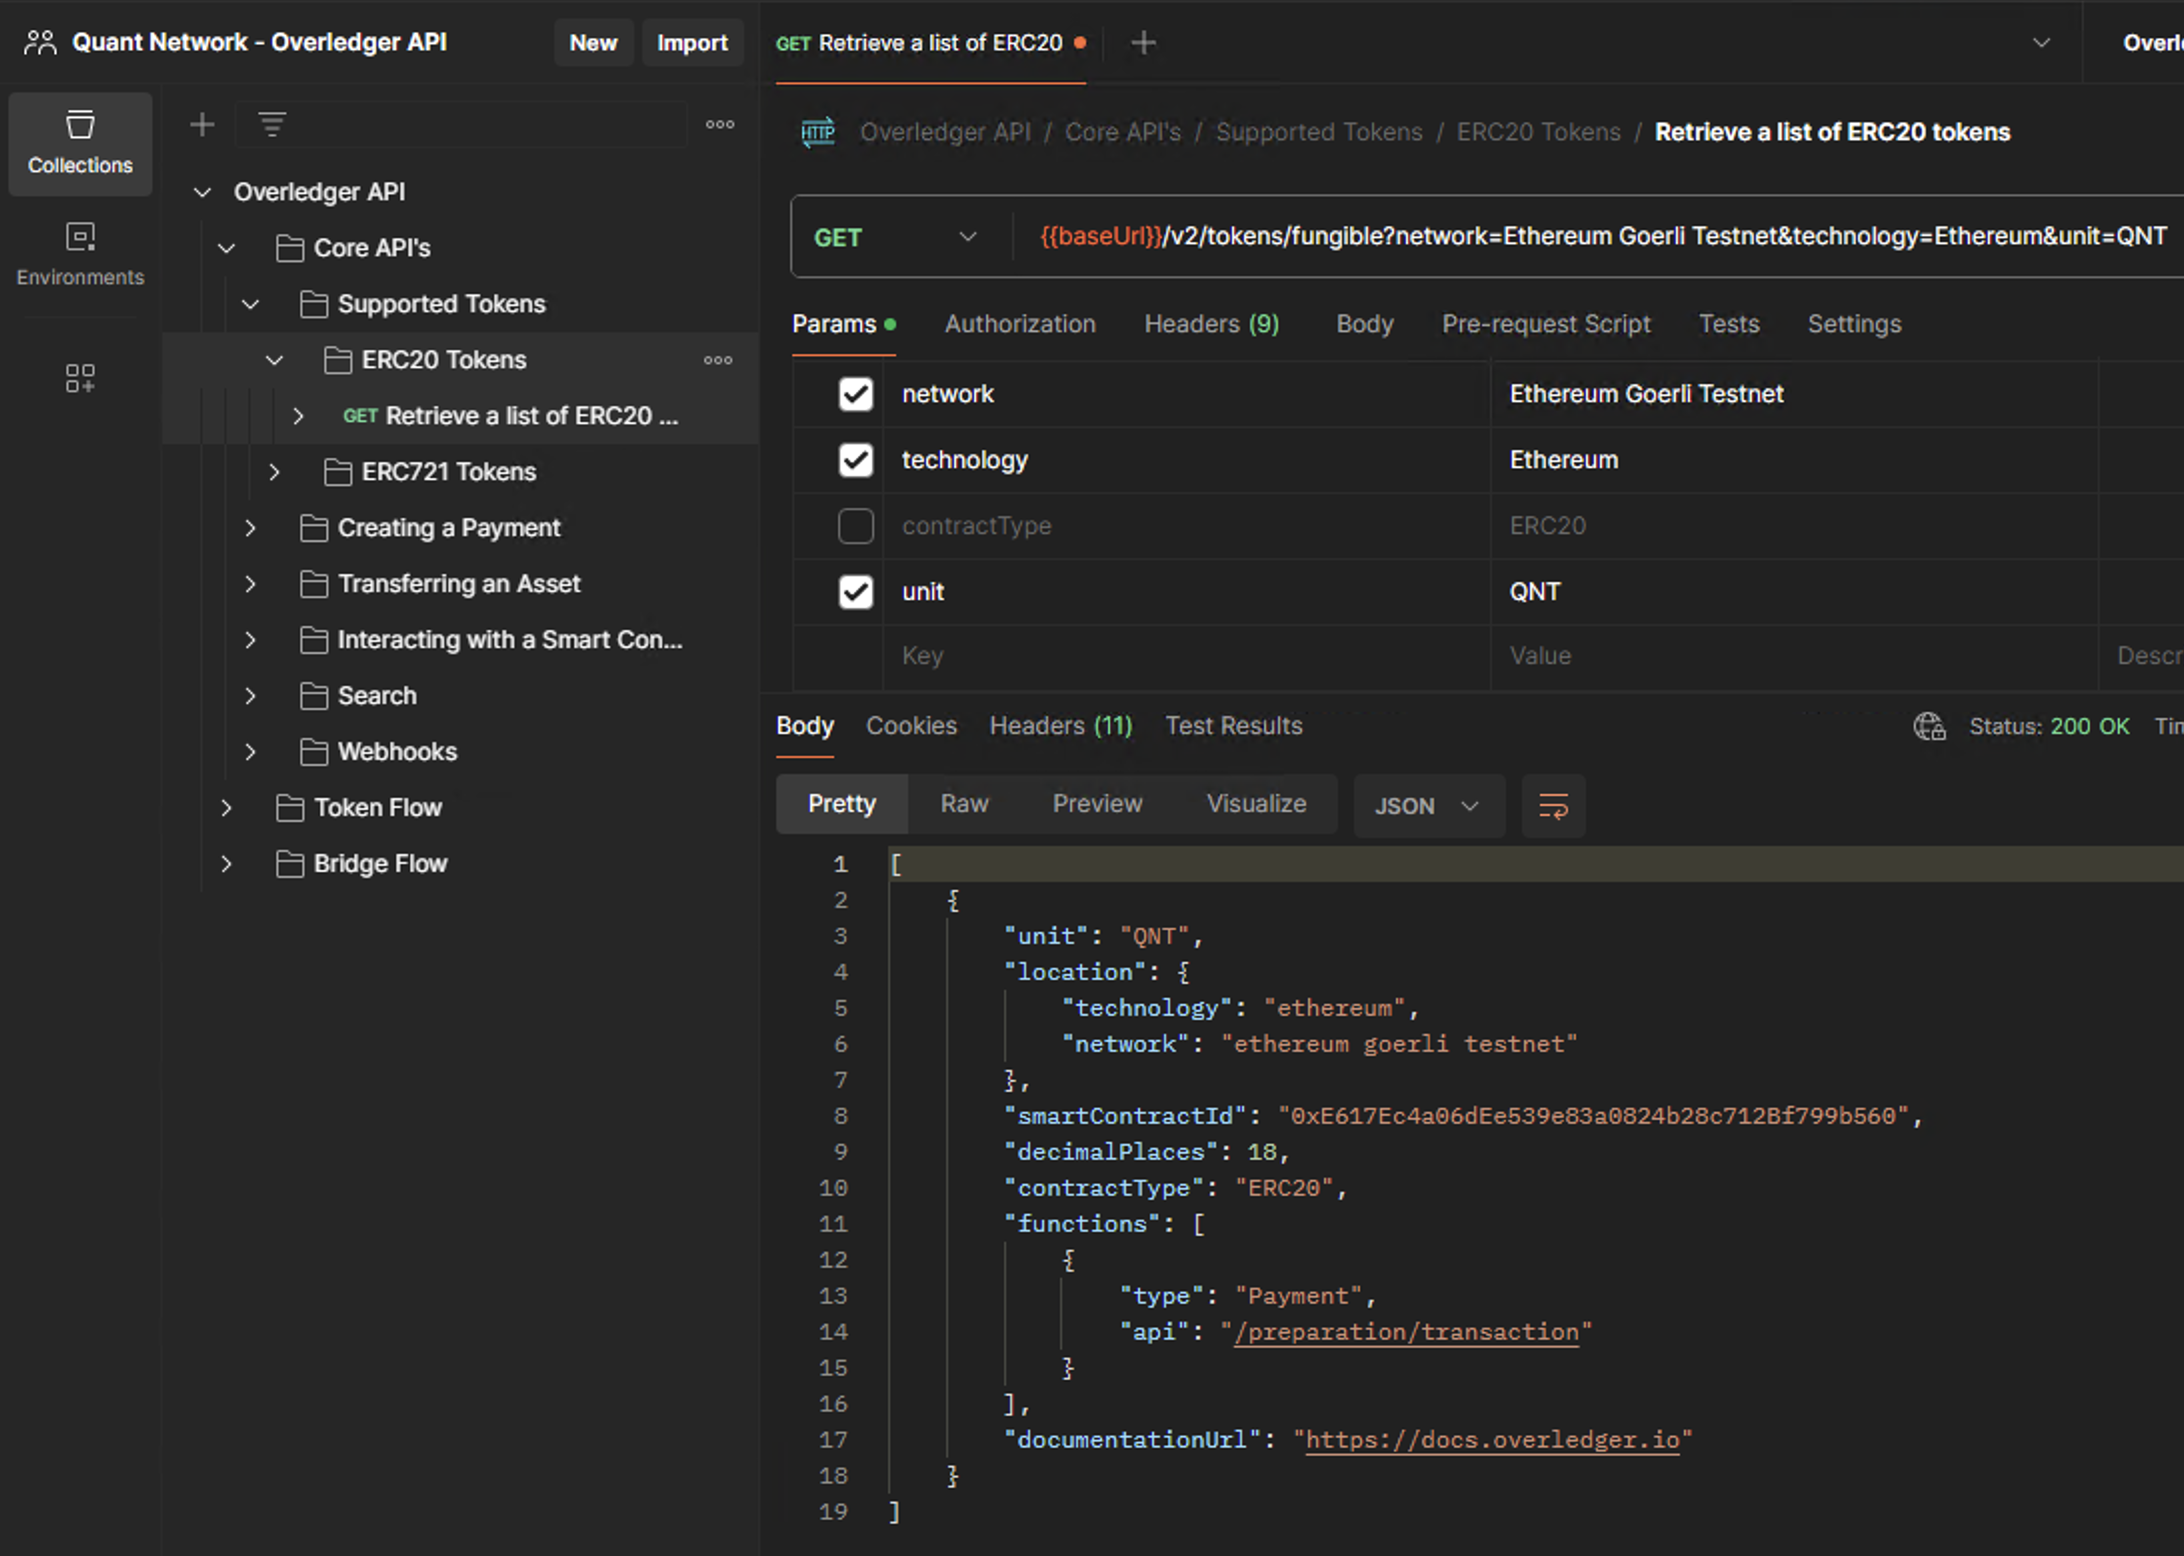
In the example below, we are going to activate the contractType parameter.

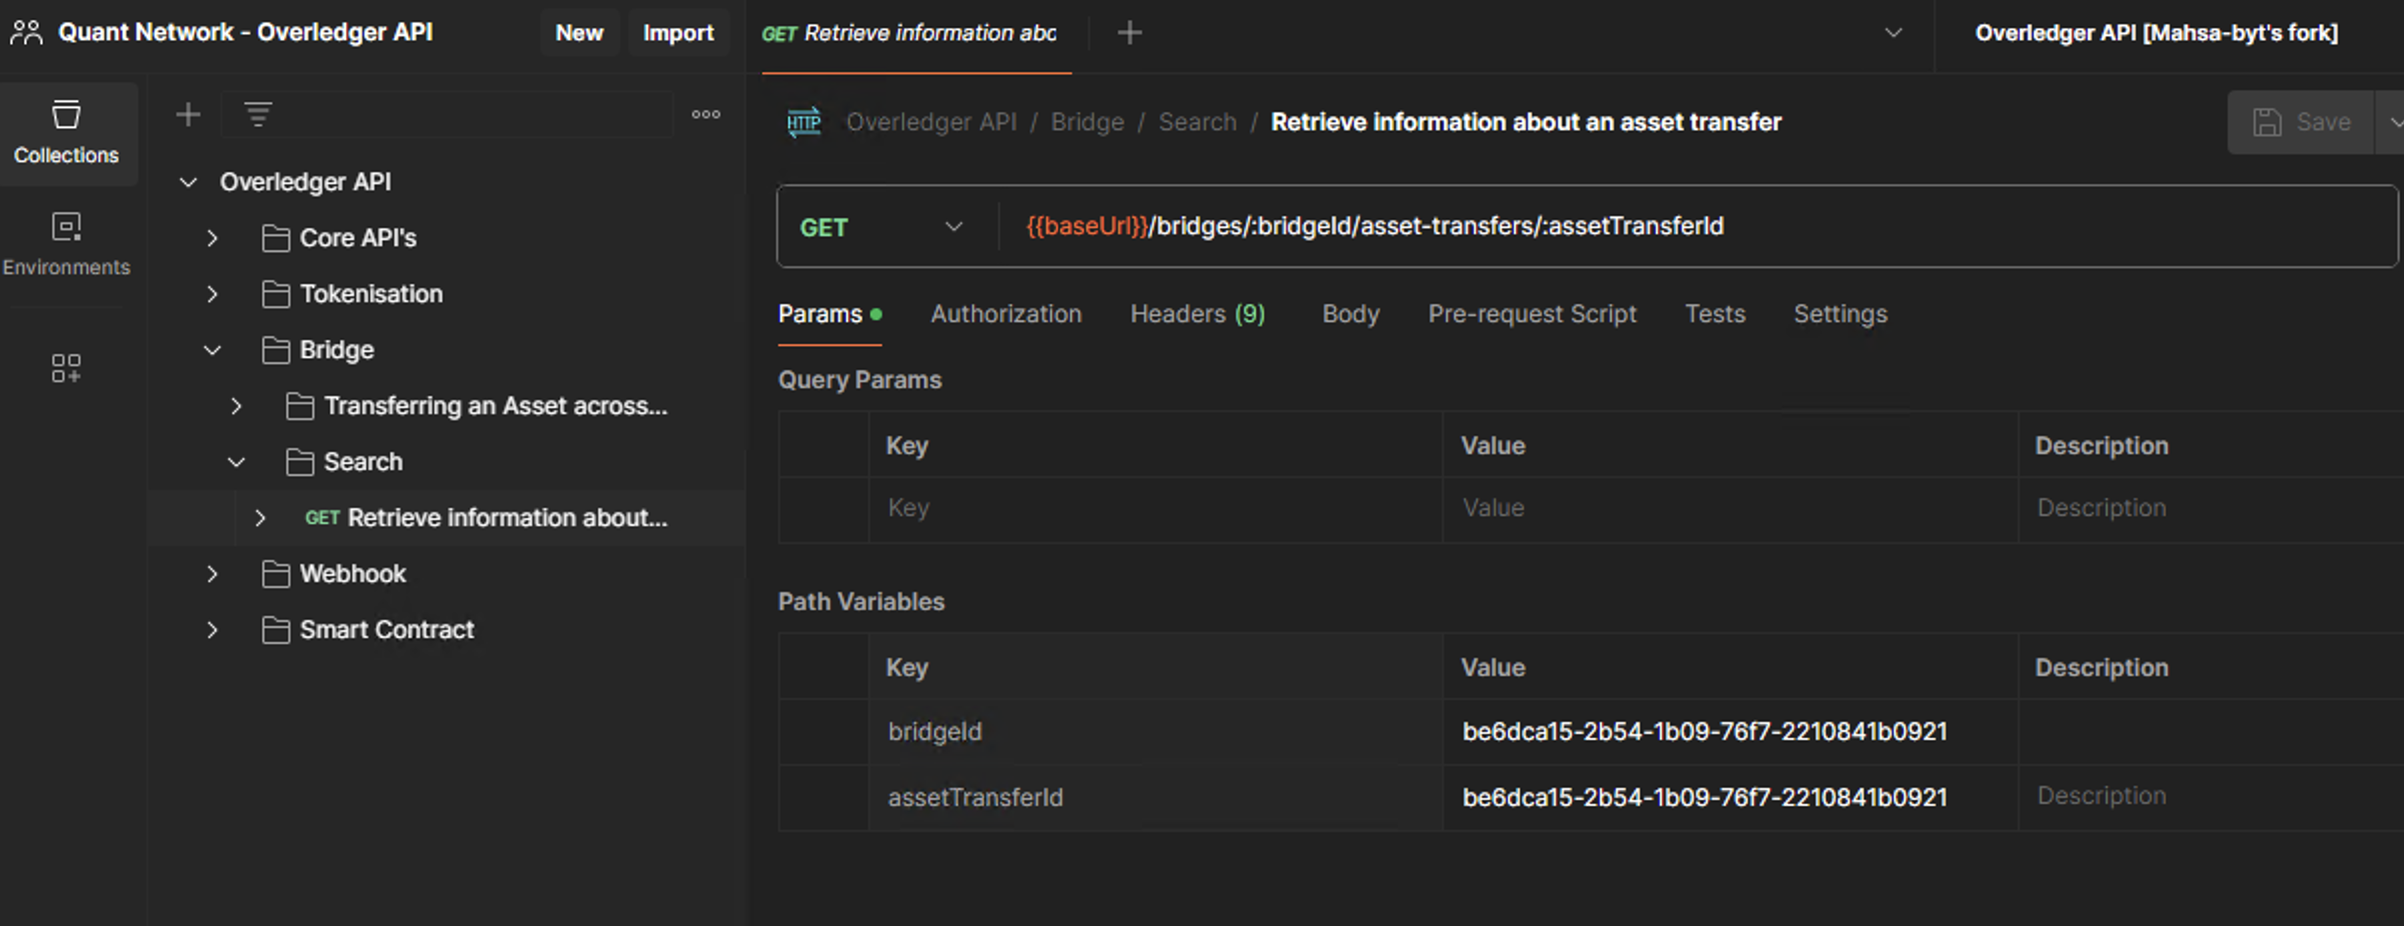
For some other APIs, we need to add the required Path Variable. The below API retrieves information on an asset transfer on a bridge, we then need to add a valid bridgeId and assetTransferId as the value.
On the Params tab, scroll down below the query parameters to the 'Path Variables' section. Here you can add the bridge identifier and asset transfer identifier that will be used as a value to the bridgeId and assetTransferId keys.
6. Send your request
When the request has been properly configured, you can now click the 'Send' button.
If all parameters have been set up correctly, you will receive a response.
Updated about 2 months ago